Elasticsearch Backup And Restore
How To Take Elasticsearch Backup (Snapshot) And Restore
This post is about "How to take Elasticsearch backup and restore it back".
Video Tutorial:
Elasticsearch Installation
brew is a tool on mac to install stuff. As Elasticsearch requires Java, we need to install java first and than Elasticsearch.brew update
brew cask install java
brew search elasticsearch
elasticsearch homebrew/versions/elasticsearch24homebrew/versions/elasticsearch17brew install homebrew/versions/elasticsearch17Check if elasticsearch has installed or not.
brew info elasticsearch
Creating first document with index
names - The "type" having similar data/infomyid - The id for the datapretty - Simply means we want well-formatted outputcurl -XPOST ‘localhost:9200/nameindex/names/myid?pretty’ -d ‘
{
“name”: “Ajeet”,
“email_address”: “[email protected]”
}’

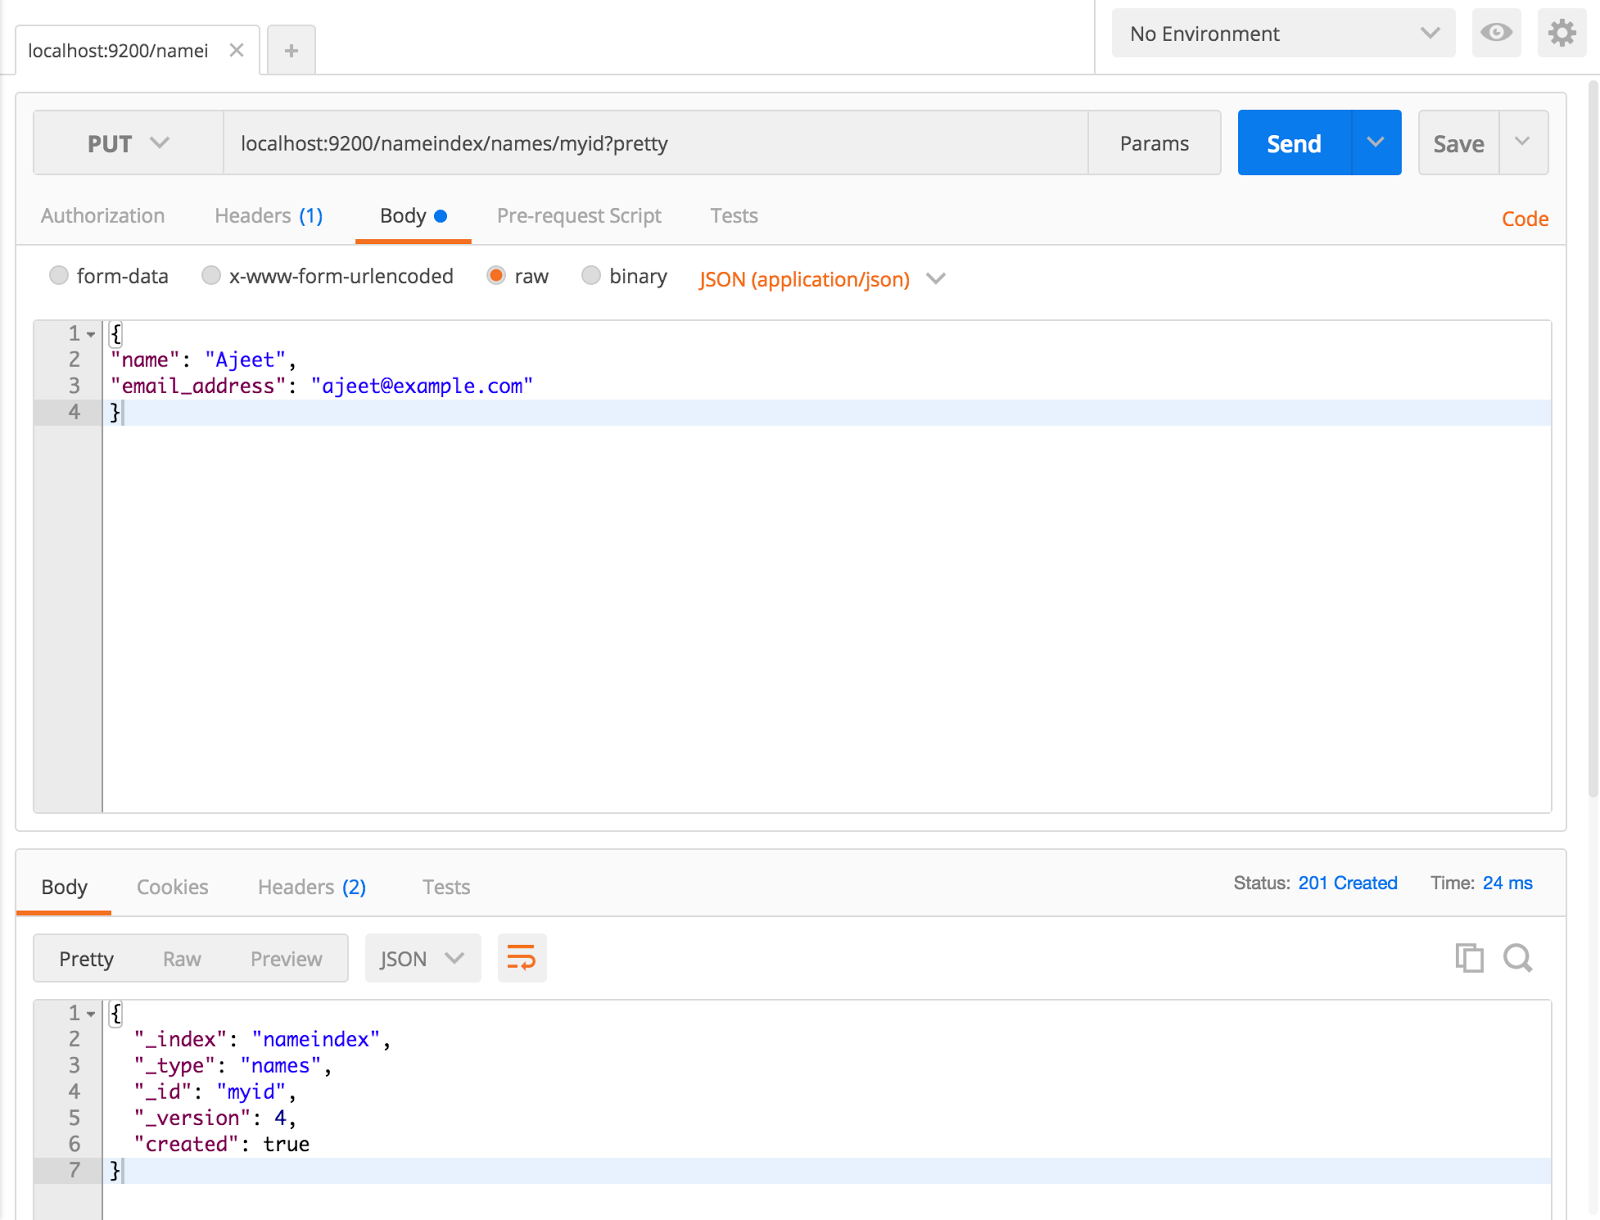
If you insert another record with the same id "myid" than existing record will get updated.Creating A Document without "id"
curl -XPOST ‘localhost:9200/nameindex/names?pretty’ -d ‘
{
“name”: “no_id”,
“email_address”: “[email protected]”
}’

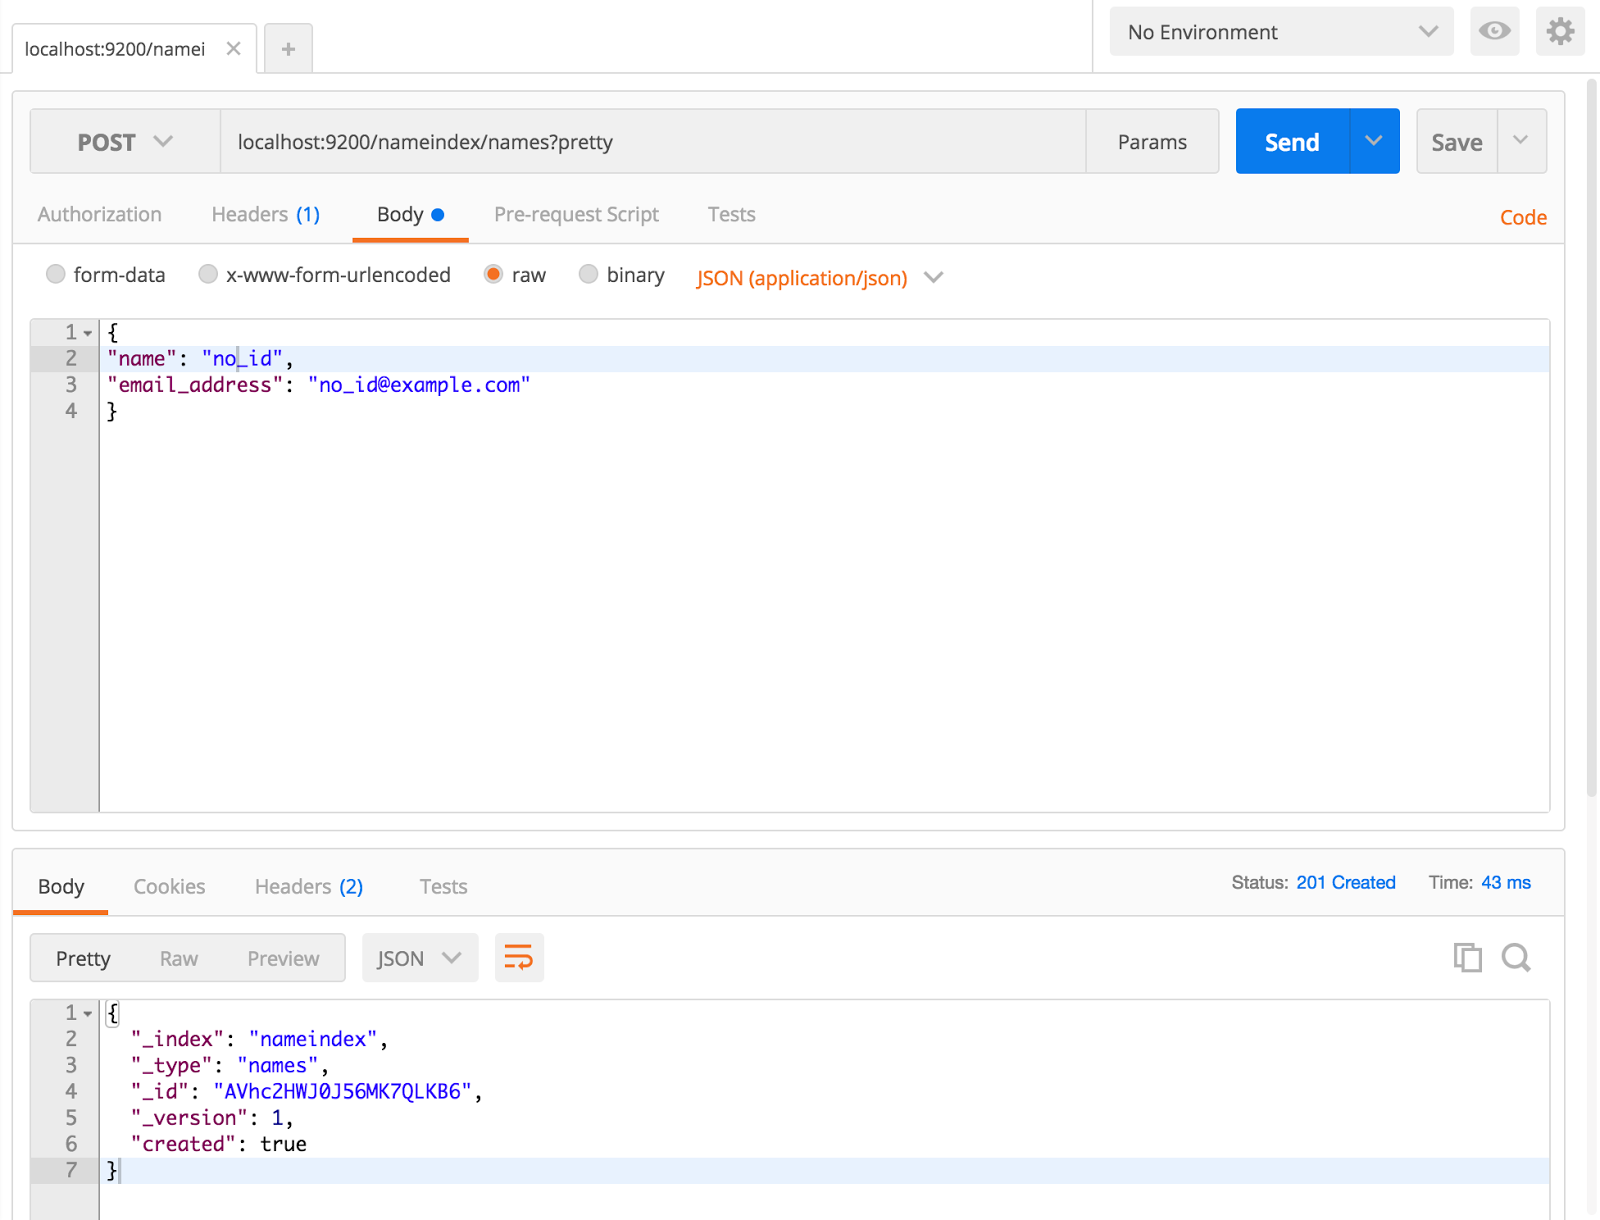
As you can see it has automatically generated the "id".Backup & Resotre
For Backup we need to create two repository (logical and physical).
Let's create the physical repository
mkdir es_backup
Now we will tell elasticsearch, the path of our repository in config file.vi /usr/local/Cellar/elasticsearch17/1.7.5/config/elasticsearch.yml
add the repository path:path.repo: /Users/zombie/es_bakcup
save and exit.
Check if any snapshot is present
curl localhost:9200/_snapshot
The output would be blank as we have not taken any snapshot yet.Snapshot can be taken for few or a particular index or of the whole cluster. To take backup index-wise create sub-directory inside the parent repository.
Now we will create logical repository. Here we will take snapshot of particular index "nameindex"
Restart elasticsearch to take path.repo changes and run the following to register the repository:curl -XPUT ‘localhost:9200/_snapshot/nameindexbackup’ -d ‘{
“type”: “fs”,
“settings”: {
“location”: “nameindex”,
“compress”: “true”
}
}’
No need to specify the full path in "location" as we have already specified it in the config file path.repo.This will create the logical repository which you can check in the parent folder. A sub directory must have been created with name "nameindex".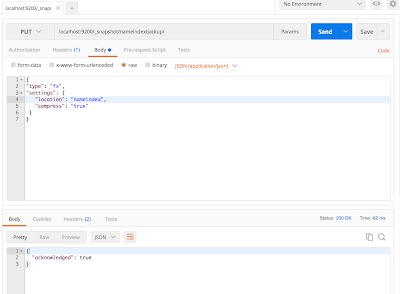

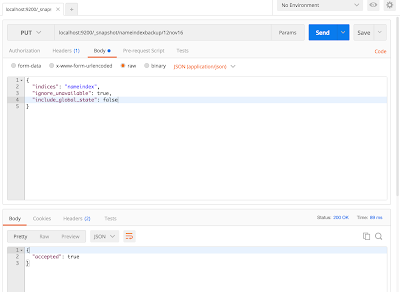
Now we will take the backup
CURL -XPUT ‘localhost:9200/_snapshot/nameindexbackup/12nov16’ -d ‘{
“indices”: “nameindex”,
“ignore_unavailable”: true,
“include_global_state”: false
}’
indices field may have multiple index with comma separated values.
ignore_unavailable means don't stop the snapshot process if any shards is not available.
include_global_state means take snapshot of cluster status also. If the status is yellow than while restore the yellow status will be there. If you don't want this than set it to false.

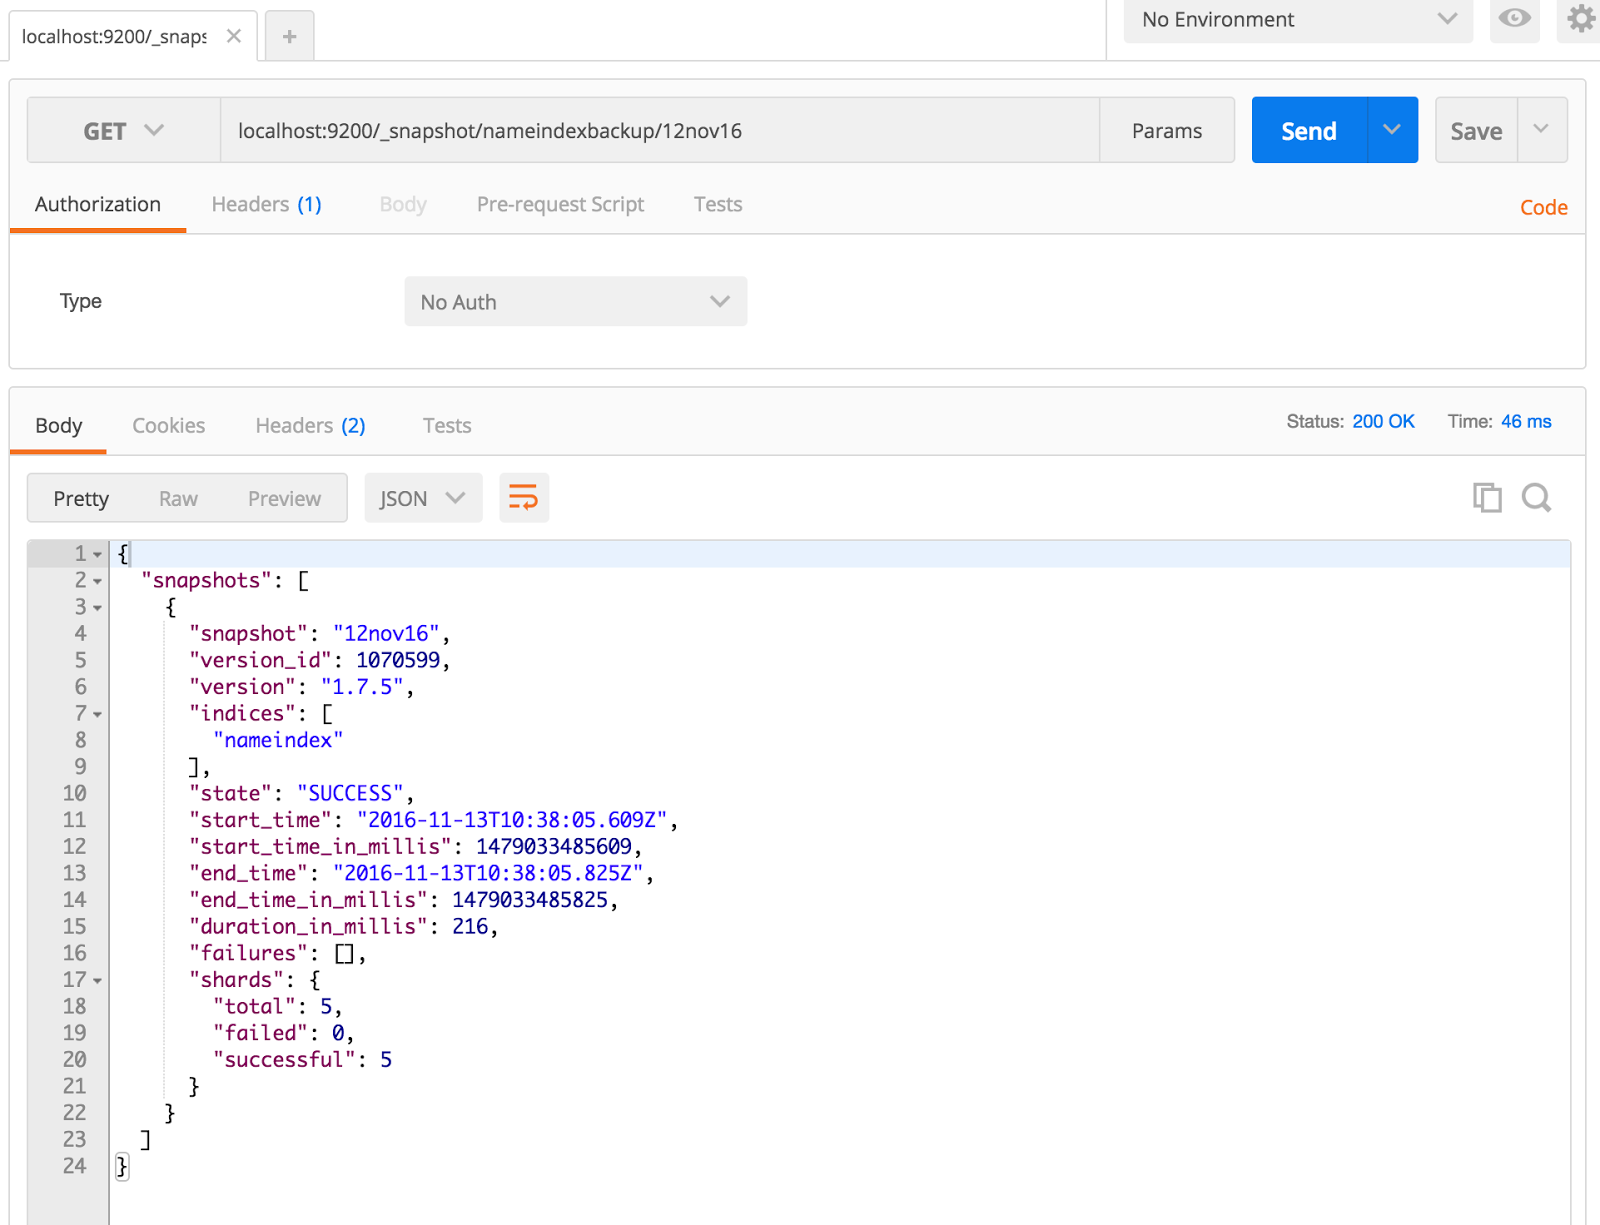
To check if snapshot is completed or not fire a GET request
curl localhost:9200/_snapshot/nameindexbackup/12nov16

Restore the Snapshot
First delete the data from elasticsearch
curl -XDELETE localhost:9200/nameindexNow if you throw a GET request you will get 404. Let's restore the index now.


Now do a GET request if data is restored or not.

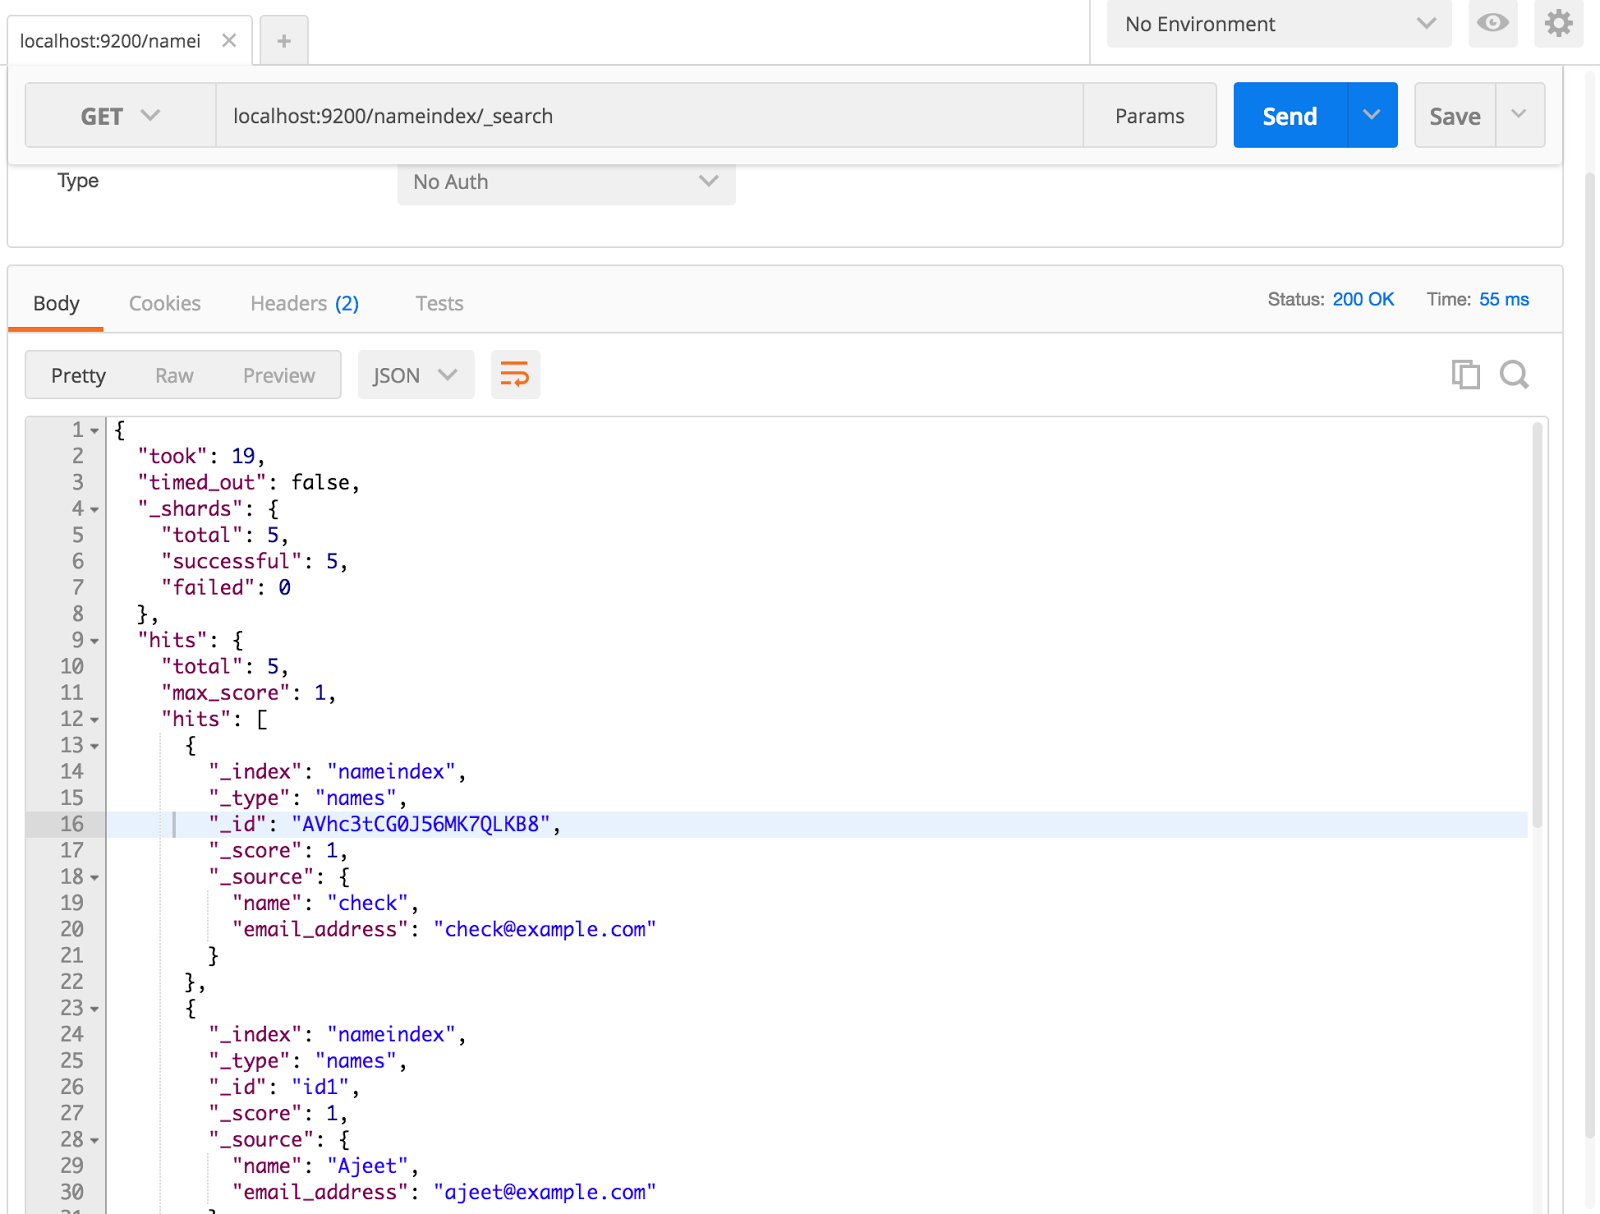
We have successfully restored the elasticsearch data.During restore you can also provide certain information curl -XPOST ‘localhost:9200/_snapshot/nameindexbackup/12nov16/_restore’ -d ‘{
“indices”: “index_1,index_2”,
“ignore_unavailable”: true,
“include_global_state”: true,
“rename_pattern”: “index_(.+)”,
“rename_replacement”: “restored_index_$1”
}’