How to setup kubernetes cluster on AWS using KOPS (kubernetes operations)
Understanding Kubernetes?
“Kubernetes is a portable, extensible, open-source platform for managing containerized workloads and services, that facilitates both declarative configuration and automation.”
In this post, we will learn how to setup kubernetes cluster on AWS using KOPS (kubernetes operations).
NOTE: We assume that you have a basic understanding about Kubernetes and AWS.
Prerequisites:
- Ubuntu instance
- AWS-cli setup
- S3 bucket
Video Tutorial To Understand How Kubernetes Works:
Video Tutorial To Setup Kubernetes Using KOPS:
Installing kubectl (Command line tool to interact with K8s cluster)
First of all check if you have AWS cli is setup and also the kops binary on your ubuntu instance. kubectl is also needed, let’s install it as shown below
– To install on macOS, run the following command:
brew install kubernetes-cli
– To install on Linux, run the following command:
curl -LO https://storage.googleapis.com/kubernetes-release/release/$(curl -s https://storage.googleapis.com/kubernetes-release/release/stable.txt)/bin/linux/amd64/kubectl
chmod +x ./kubectl
sudo mv ./kubectl /usr/local/bin/kubectl
Now, we will install kops on ubuntu:
wget https://github.com/kubernetes/kops/releases/download/1.6.1/kops-linux-amd64
chmod +x kops-linux-amd64
sudo mv kops-linux-amd64 /usr/local/bin/kops
Creating a domain on Route53 for k8s cluster
Kubernetes uses DNS for discovery inside the cluster so that you can reach out kubernetes API server from clients.
Create a hosted zone on Route53, for example, k8s.appychip.vpc. The API server endpoint will then be api.k8s.appychip.vpc
Create a S3 bucket
Next step is to create a S3 bucket which will store the configuration of the cluster:
$ aws s3 mb s3://clusters.k8s.appychip.vpc
Set the following environment variable with the S3 URL:
$ export KOPS_STATE_STORE=s3://clusters.k8s.appychip.vpcCreate Kubernetes Cluster
Now we’re ready to create a cluster. We can reuse existing VPC (kops will create a new subnet in this VPC) by providing the vpc-id option:
$ kops create cluster --cloud=aws --zones=us-east-1d --name=useast1.k8s.appychip.vpc --dns-zone=appychip.vpc --dns privateNOTE: You must have ssh keys which are already generated otherwise it will throw an error.
Following command will create the cluster:
kops update cluster useast1.k8s.appychip.vpc --yesThis will do all the required stuff of creating the VPC, subnets, autoscaling-groups, nodes etc which you can observe in the output. If you want to review what all things going to happen when this command would be run then run the above command without –yes option. Without –yes option, it will print the action it is going to perform without actually doing it.
To edit the cluster settings with one of these commands:
- List clusters with: kops get cluster
- Edit this cluster with:
kops edit cluster useast1.k8s.appychip.vpc - Edit your node instance group:
kops edit ig --name=useast1.k8s.appychip.vpc nodes - Edit your master instance group:
kops edit ig --name=useast1.k8s.appychip.vpc master-us-east-1d
It will take some time for the instances to boot and the DNS entries to be added in the zone. Once everything is up you should be able to get the kubernetes nodes:
$ kubectl get nodes

NAME                          STATUS AGE VERSION
ip-172-20-33-144.ec2.internal Ready  4m  v1.6.2
ip-172-20-39-78.ec2.internal  Ready  1m  v1.6.2
ip-172-20-45-174.ec2.internal Ready  2m  v1.6.2
To enable the Kubernetes UI you need to install the UI service:
$ kubectl create -f https://rawgit.com/kubernetes/dashboard/master/src/deploy/kubernetes-dashboard.yaml
Then you can use the kubctl proxy to access the UI from your machine:
$ kubectl proxy --port=8080 &
The UI should now be available at http://localhost:8080
Deploying Nginx Container
Let’s test out the new Kubernetes cluster by deploying a simple service made up of nginx containers:
Create an nginx deployment:
$ kubectl run sample-nginx --image=nginx --replicas=2 --port=80
$ kubectl get pods

NAME                       READY     STATUS    RESTARTS   AGE
sample-nginx-379829228-xb9y3   1/1       Running   0          10s
sample-nginx-379829228-yhd25   1/1       Running   0          10s

$ kubectl get deployments
NAME       DESIRED   CURRENT   UP-TO-DATE   AVAILABLE   AGE
sample-nginx   2         2         2            2           29s
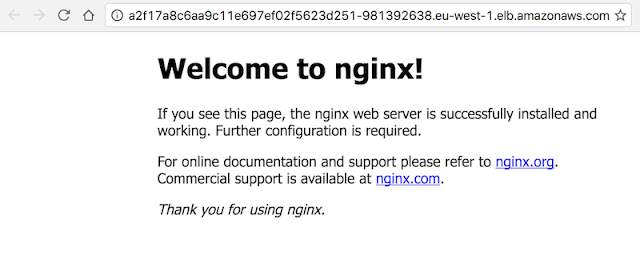
Expose the deployment as service. This will create an ELB in front of those 2 containers and allow us to publicly access them:
$ kubectl expose deployment sample-nginx --port=80 --type=LoadBalancer

$ kubectl get services -o wide
NAME         CLUSTER-IP      EXTERNAL-IP                                                              PORT(S)   AGE       SELECTOR
kubernetes   100.64.0.1      <none>                                                                   443/TCP   25m       <none>
sample-nginx     100.70.129.69   adca6650a60e611e7a66612ae64874d4-175711331.us-east-1.elb.amazonaws.com/   80/TCP    19m       run=sample-nginx
If you check on AWS console, there must be an ELB running with our nginx containers behind it:
http://adca6650a60e611e7a66612ae64874d4-175711331.us-east-1.elb.amazonaws.com

You can also view the UI by accessing master node. Hit master node’s IP/Domain in browser, it will ask for credentials.
Run command kubectl config view to see the credentials.
